
XAMPP for Mac 7.4.13 のWordPress設定
公開日:2021年09月12日
更新日:2023年02月14日
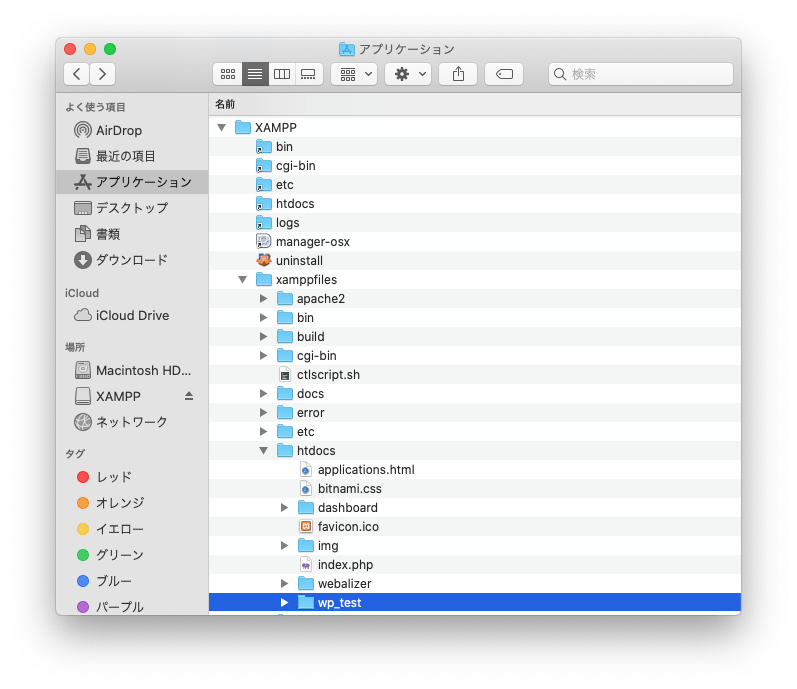
WordPressファイルを配置
htdocsフォルダにWordPressサイトからダウンロードしたフォルダを配置します。 今回はwordpressフォルダ名を「wp_test」に変更して配置しています。
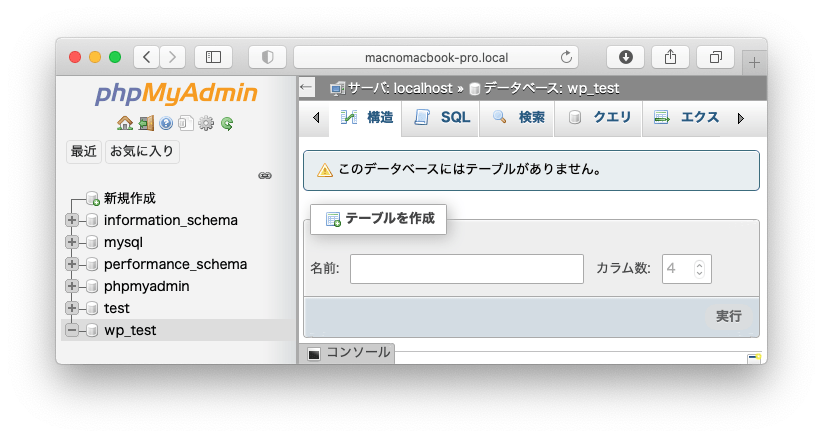
phpMyAdminを使ってDB領域作成
今回はDB領域名を「wp_test」で作成しています。
WordPressインストール前に設定
ターミナルを「bash」で起動
ターミナルを起動してメニューバー「ターミナル」>「環境設定」をクリックします。
画面中央「開くシェル」で「コマンド」を選択し「/bin/bash」と入力します。

メニュバー「シェル」>「新規ウィンドウ」を選択してターミナル起動
WordPressフォルダに書き込みと実行権限を付与する
ターミナルに以下のコマンドを入力して実行します。WordPressフォルダ「wp_test」部分は自分のWordpressフォルダ名に置き換えること。
chmod -R 777 /Applications/XAMPP/xamppfiles/htdocs/wp_test【ここは適宜変更】
上記設定終了後、WordPressをインストール
WordPressインストール後の設定
WordPressフォルダに書き込みと実行権限を付与する
WordPressインストール後にもう一度ターミナルに以下のコマンドを入力して実行します。WordPressフォルダ「wp_test」部分は自分のWordpressフォルダ名に置き換えること。
chmod -R 777 /Applications/XAMPP/xamppfiles/htdocs/wp_test【ここは適宜変更】
ユーザ名とグループ名を確認
ターミナルに以下のコマンドを入力して実行します。WordPressフォルダ「wp_test」部分は自分のWordpressフォルダ名に置き換えること。
ls -l /Applications/XAMPP/xamppfiles/htdocs/wp_test【ここは適宜変更】
実行後以下のような結果が表示されます。
【ユーザ名】と【グループ名】を確認します。
total 392
-rwxrwxrwx@   1 【ユーザ名】 【グループ名】    405  2  6  2020 index.php
-rwxrwxrwx@   1 【ユーザ名】 【グループ名】  19915  1  1  2021 license.txt
-rwxrwxrwx@   1 【ユーザ名】 【グループ名】  10083  9 10 16:00 readme.html
-rwxrwxrwx@   1 【ユーザ名】 【グループ名】   7165  1 21  2021 wp-activate.php
drwxrwxrwx@ 100 【ユーザ名】 【グループ名】   3200  9 10 16:00 wp-admin
-rwxrwxrwx@   1 【ユーザ名】 【グループ名】    351  2  6  2020 wp-blog-header.php
-rwxrwxrwx@   1 【ユーザ名】 【グループ名】   2328  2 17  2021 wp-comments-post.php
-rwxrwxrwx@   1 【ユーザ名】 【グループ名】   4068  9 10 16:00 wp-config-sample.php
drwxrwxrwx@   6 【ユーザ名】 【グループ名】    192  9 10 16:00 wp-content
-rwxrwxrwx@   1 【ユーザ名】 【グループ名】   3939  7 30  2020 wp-cron.php
drwxrwxrwx@ 237 【ユーザ名】 【グループ名】   7584  9 10 16:00 wp-includes
-rwxrwxrwx@   1 【ユーザ名】 【グループ名】   2496  2  6  2020 wp-links-opml.php
-rwxrwxrwx@   1 【ユーザ名】 【グループ名】   3900  5 15 17:38 wp-load.php
-rwxrwxrwx@   1 【ユーザ名】 【グループ名】  45463  4  6 18:39 wp-login.php
-rwxrwxrwx@   1 【ユーザ名】 【グループ名】   8509  4 14  2020 wp-mail.php
-rwxrwxrwx@   1 【ユーザ名】 【グループ名】  22297  6  1 23:09 wp-settings.php
-rwxrwxrwx@   1 【ユーザ名】 【グループ名】  31693  5  7 20:16 wp-signup.php
-rwxrwxrwx@   1 【ユーザ名】 【グループ名】   4747 10  8  2020 wp-trackback.php
-rwxrwxrwx@   1 【ユーザ名】 【グループ名】   3236  6  8  2020 xmlrpc.php
「httpd.conf」の変更
「XAMPP」>「xamppfiles」>「etc」>「httpd.conf」をVSCode等で編集します。
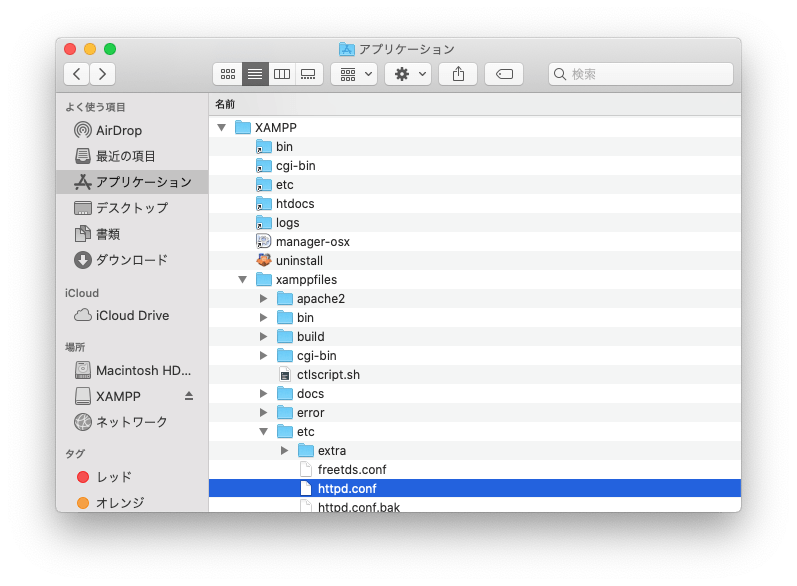
174行目付近の以下の場所を、先程調べた【ユーザ名】と【グループ名】に変更して保存します。
<IfModule unixd_module>
#
# If you wish httpd to run as a different user or group, you must run
# httpd as root initially and it will switch.
#
# User/Group: The name (or #number) of the user/group to run httpd as.
# It is usually good practice to create a dedicated user and group for
# running httpd, as with most system services.
#
User 【ユーザ名】
Group 【グループ名】
</IfModule>
apacheを再起動
設定変更後はサービスを再起動します。「Apache Web Server」を選択して「Restart」をくりっくします。
ブラウザで表示していたページがある場合はリロードします。

以上で設定完了です。
同じカテゴリーのコンテンツ