
15:アイキャッチ画像表示
公開日:2019年07月14日
更新日:2019年07月15日
アイキャッチ画像を表示する
アイキャッチ画像表示用関数はページ内容表示用ループ内で使用します。
<?php
// アイキャッチ画像が設定されているか確認
if (has_post_thumbnail()) {
  // アイキャッチ画像が設定されている時の処理
  // アイキャッチ画像img要素を出力
  the_post_thumbnail();
}
?>
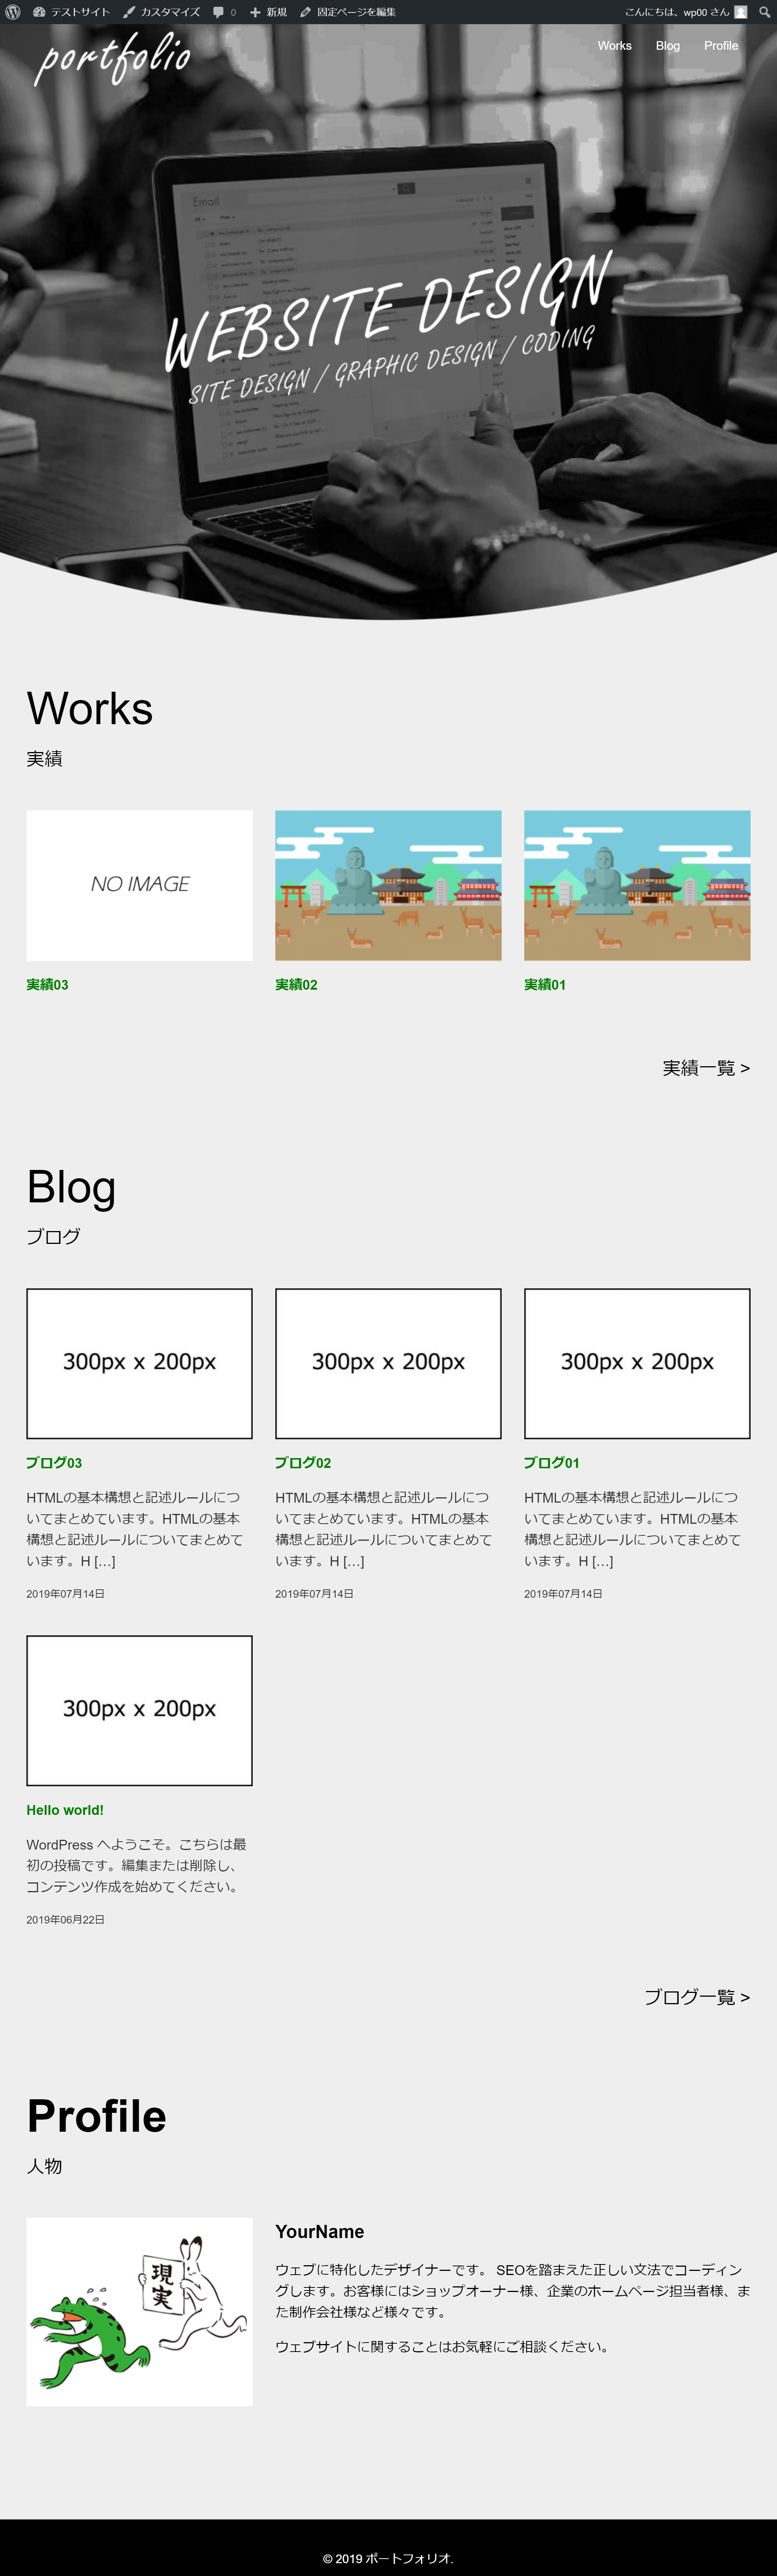
実績のアイキャッチ画像を表示
front-page.php
変更前
      <div class="flex-item">
        <a href="<?php the_permalink(); ?>">
          <div class="image">
            <img src="<?php echo get_stylesheet_directory_uri(); ?>/img/thumbnail.jpg" alt="実績タイトル">
          </div>
          <div class="item-title"><?php the_title(); ?></div>
        </a>
      </div><!-- .flex-item -->
変更後
img要素をアイキャッチ画像表示用関数に置き換えます。
      <div class="flex-item">
        <a href="<?php the_permalink(); ?>">
          <div class="image">

<?php
if (has_post_thumbnail()) {
  the_post_thumbnail();
}
?>

          </div>
          <div class="item-title"><?php the_title(); ?></div>
        </a>
      </div><!-- .flex-item -->
表示するアイキャッチ画像のサイズを指定
the_post_thumbnail関数の引数に画像サイズの名称を文字列で指定します。
引数なしの場合は「フルサイズ」もしくは「set_post_thumbnail_size関数」で指定したサイズになります。
管理画面指定サイズのアイキャッチ画像出力
| the_post_thumbnail(‘thumbnail’) | サムネイル (デフォルト 150px x 150px :最大値) |
|---|---|
| the_post_thumbnail(‘medium’) | 中サイズ (デフォルト 300px x 300px :最大値) |
| the_post_thumbnail(‘large’) | 大サイズ (デフォルト 1024px x 1024px :最大値) |
| the_post_thumbnail(‘full’) | フルサイズ (アップロードした画像の元サイズ) |
| the_post_thumbnail( array(300,200) ) | この引数の場合は横幅300px、縦幅を200pxにリサイズされる |
テーマ指定サイズのアイキャッチ画像出力
テーマの「functions.php」で指定したアイキャッチ画像サイズを出力する際は、第1引数で指定した名称を使用します。
functions.php
// アイキャッチ画像サイズの設定
if ( function_exists( 'add_image_size' ) ) {
  add_image_size('img_300_200', 300, 200, true);
  add_image_size('img_960_200', 960, 200);
}
変更前
      <div class="flex-item">
        <a href="<?php the_permalink(); ?>">
          <div class="image">

<?php
if (has_post_thumbnail()) {
  the_post_thumbnail();
}
?>

          </div>
          <div class="item-title"><?php the_title(); ?></div>
        </a>
      </div><!-- .flex-item -->
変更後
the_post_thumbnail関数の引数に画像サイズの名称を文字列で指定します。
      <div class="flex-item">
        <a href="<?php the_permalink(); ?>">
          <div class="image">

<?php
if (has_post_thumbnail()) {
  the_post_thumbnail('img_300_200');
}
?>

          </div>
          <div class="item-title"><?php the_title(); ?></div>
        </a>
      </div><!-- .flex-item -->
アイキャッチ画像が設定されていない時を考慮する
front-page.php
変更前
      <div class="flex-item">
        <a href="<?php the_permalink(); ?>">
          <div class="image">

<?php
if (has_post_thumbnail()) {
  the_post_thumbnail('img_300_200');
}
?>

          </div>
          <div class="item-title"><?php the_title(); ?></div>
        </a>
      </div><!-- .flex-item -->
変更後
テーマフォルダの画像用フォルダ「img」にアイキャッチ画像指定されていない時用画像「no-image.png」を用意します。
「has_post_thumbnail()」で判定をしてアイキャッチ画像がないページは代替画像「no-image.png」を表示します。
      <div class="flex-item">
        <a href="<?php the_permalink(); ?>">
          <div class="image">

<?php
if (has_post_thumbnail()) {
  the_post_thumbnail('img_300_200');
} else {
  echo '<img src="'.get_template_directory_uri().'/img/no-image.png" alt="'.get_the_title().'">'.PHP_EOL;
}
?>

          </div>
          <div class="item-title"><?php the_title(); ?></div>
        </a>
      </div><!-- .flex-item -->
HTML出力結果
アイキャッチ画像がある場合
<div class="thumbnail">
  <img width="300" height="200" src="画像ファイルパス" class="attachment-img_300_200 size-img_300_200 wp-post-image" alt="ページタイトル">
</div>
アイキャッチ画像がない場合
<div class="thumbnail">
  <img src="http://localhost/WordPressフォルダ/wp-content/themes/テーマ名/img/no-image.png" alt="ページタイトル">
</div>
このページで出てくる関数
WordPress関数は「公式サイトのドキュメント」で確認しましょう。
WordPress関数
表示確認
以下URLにアクセスすると以下の表示になります。
http://localhost/WordPressフォルダ名/
投稿に設定されたアイキャッチ画像が表示されます。
おさらい問題
ブログのアイキャッチ画像を表示してみましょう。
※欠席者対応:lesson07 – lesson08
同じカテゴリーのコンテンツ